PowerShell Profiles with Windows Subsystem for Linux
Terminal profiles can allow a bit of artistic opinion shine through. Lets go through what my PowerShell profile looks like, the additions it leverages, and the different influences it incorporates.
What the shell?
There are a few major components to my shell prompt currently.
- The operating system type
- The current working directory
- If the current folder is a Git repository, it will include that Git Status
- The status of the last exit code

Working on Windows, in the managedAdcs folder, which currently has a new untracked file, and the last exit code was not an error.
How does it look when it changes?
One of the first ways that the shell changes is if the last command exits with a non-zero error code. This is mainly helpful when working with very verbose commands that output a lot of information or those that catch the errors and don’t provide the explicit error itself.

The last command exited with an error.
Another frequent change is the operating system indicator. Having the same shell experience across platforms is a really cool benefit, but making sure you know which you are on helps prevent confusion. In Windows we show the Windows flag icon and in Windows Subsystem for Linux (WSL) we show the Linux Distribution’s icon.
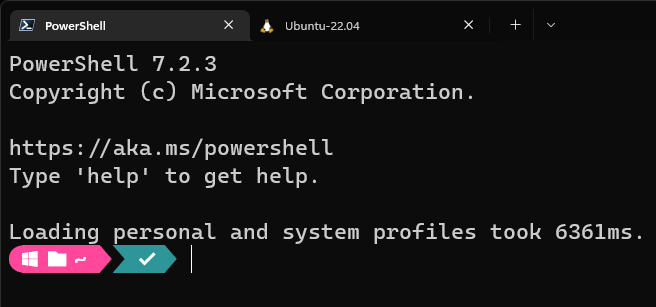
The Windows prompt.
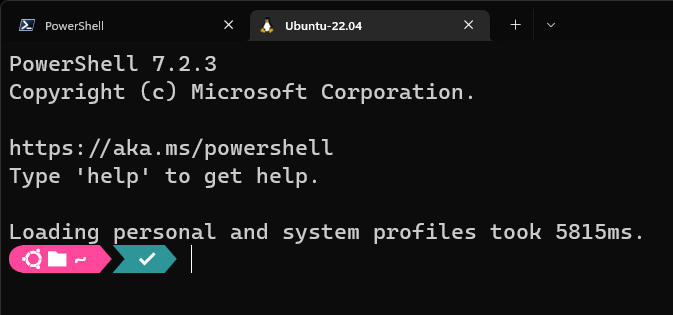
The Ubuntu prompt in WSL.
The profile also loads a few PowerShell modules that are nice to haves. Below is an example of the PSReadLine module. This provides automatic pattern matching against the shell’s command history, and, recently added, completion suggestions as a new provider.

Example of PSReadLine with command history and completion suggestions.
The profile imports the Terminal-Icons module as well, just to add a little more visual fun to the experience.
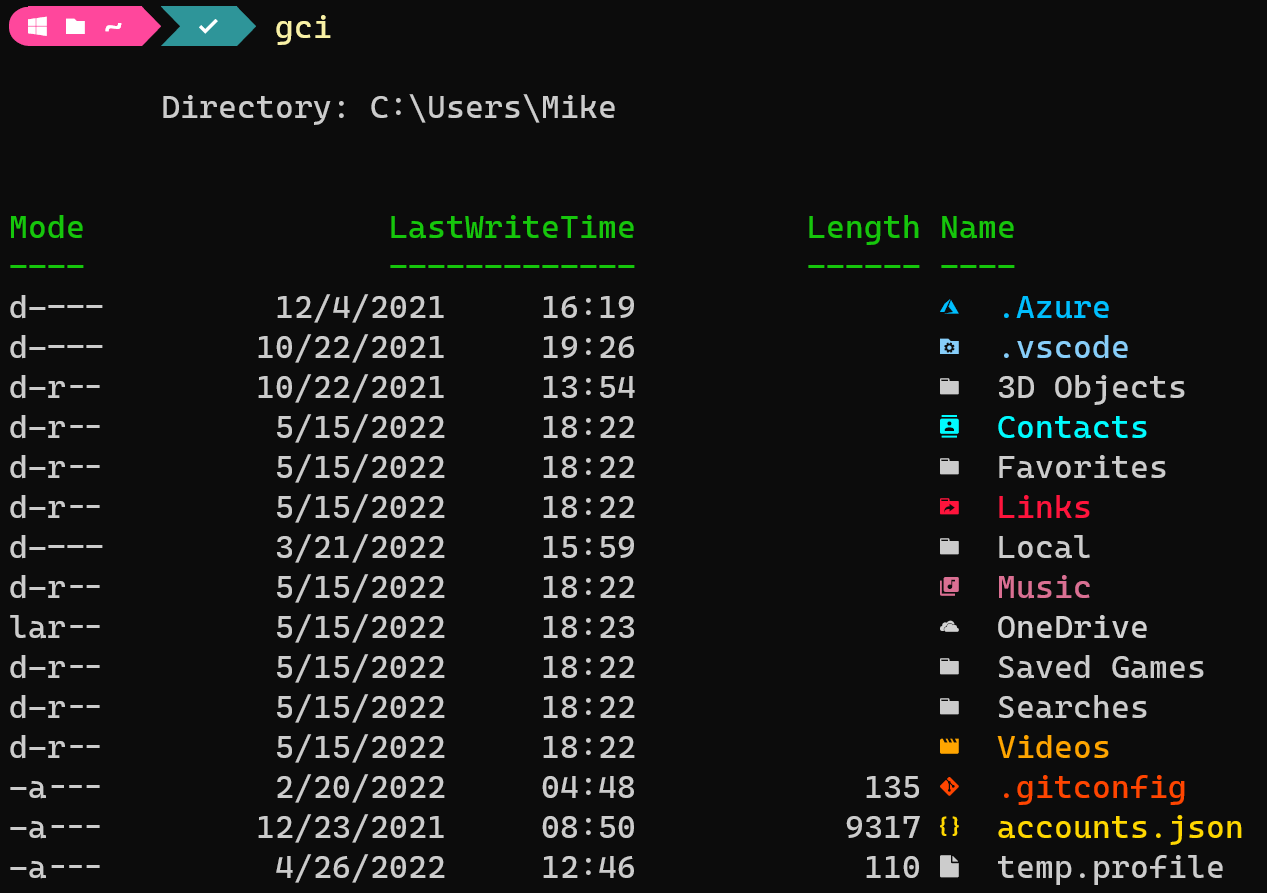
Example of Terminal Icons.
How does it all work?
Lets walk through some of the background work the profile is doing, some of the influences, and some of the drawbacks now.
What are you doing?
One of the first validations the profile performs is determining if the current session is running as a local admin. Generally, the only time I will run a shell as an admin outright is to troubleshoot an issue, and the last thing I want to do is be troubleshooting an issue in my profile and something else at the same time. If PowerShell determines the current session is a local admin, then it will just load the default profile.
if ($IsWindows)
{
    $identity = [Security.Principal.WindowsIdentity]::GetCurrent()
    $principal = New-Object Security.Principal.WindowsPrincipal $identity
    $isAdmin = ($principal.IsInRole([Security.Principal.WindowsBuiltinRole]::Administrator))
}
if ($IsLinux)
{
    $principal = & id -u
    $isAdmin = $principal -eq 0
}
The next check the profile looks for is a couple of dependencies that require operating system specific procedures to validate. These sections both verify that the CaskaydiaCove Nerd Font family is available and that Oh My Posh is installed.
The font family provides all the beautiful icons for the great context in the prompt and shell. Oh My Posh allows us to dynamically change the shell’s prompt given different configurations.
In Linux we also define an environment variable in PowerShell for temporary files, and will perform an install of Oh My Posh if it is not found.
    if ($IsWindows)
    {
        [System.Reflection.Assembly]::LoadWithPartialName("System.Drawing")|Out-Null
        if (-not ((New-Object System.Drawing.Text.InstalledFontCollection).Families -contains "CaskaydiaCove NF"))
        {
            Write-Error "CaskaydiaCove NF font family not installed - https://github.com/ryanoasis/nerd-fonts/releases/download/v2.1.0/CascadiaCode.zip"
            break
        }
        if (-not ((Get-Command oh-my-posh|measure).Count -gt 0))
        {
            Write-Error "Oh My Posh not available"
            break
        }
    }
    if ($IsLinux)
    {
        if (-not (& fc-list|?{$_ -like "*Caskaydia*"}|measure).Count -gt 0)
        {
            Write-Error "CaskaydiaCove NF font family not installed - https://github.com/ryanoasis/nerd-fonts/releases/download/v2.1.0/CascadiaCode.zip"
            break
        }
        if (-not ((& which oh-my-posh)|measure).Count -gt 0)
        {
            Write-Error "Oh My Posh not installed, attempting install"
            sudo wget https://github.com/JanDeDobbeleer/oh-my-posh/releases/latest/download/posh-linux-amd64 -O /usr/local/bin/oh-my-posh
            sudo chmod +x /usr/local/bin/oh-my-posh
        }
        $env:TEMP = "/tmp"
    }
Now that the operating system specific validations are done, we do a few more validations and some configuration.
We talked about these modules earlier, but we do check that we have a specific version of PSReadLine available to make sure that we can use the configuration we want.
We also download the Oh My Posh configuration from GitHub to ensure any updates get reflected at the next load.
    Set-PSRepository -Name "PSGallery" -InstallationPolicy Trusted
    if ($null -eq ((Get-Module -ListAvailable "PSReadLine")|?{$_.Version -eq "2.2.0"})) {Install-Module "PSReadLine" -Scope CurrentUser -AllowPrerelease -Force -MinimumVersion 2.2.0-beta3}
    if (((Get-Module -ListAvailable "PSReadLine")|measure).Count -gt 1) {Write-Error "More than 1 version of PSReadLine module found. Remove-Module for all versions other than 2.2.0 or newer."}
    if ($null -eq (Get-Module -ListAvailable "CompletionPredictor")) {Install-Module -Name CompletionPredictor -Repository PSGallery -Scope CurrentUser}
    if ($null -eq (Get-Module -ListAvailable "Terminal-Icons")) {Install-Module "Terminal-Icons" -Scope CurrentUser}
    iwr https://raw.githubusercontent.com/Snozzberries/Profiles/main/ohmyposh.json -OutFile $env:TEMP\ohmyposh.json
    oh-my-posh init pwsh -c $env:TEMP\ohmyposh.json|Invoke-Expression
    Import-Module -Name Terminal-Icons
    Import-Module -Name PSReadLine -MinimumVersion 2.2.0 -Force
    Import-Module -Name CompletionPredictor
    Set-PSReadLineOption -PredictionSource HistoryAndPlugin
    Set-PSReadLineOption -PredictionViewStyle ListView
    Set-PSReadLineOption -EditMode Windows
How do I get this?
The full profile file is available on my GitHub. A critical note is I use this profile as $PROFILE.CurrentUserAllHosts and pair that with OneDrive and known folder redirection for my Documents folder. This lets me update my profile on any of my computers and it will sync to the others through OneDrive.
What about WSL setup though?
There are a few extra steps needed for this to work seamlessly with WSL. All of this content is also on my GitHub in the same repository for reference.
Installing PowerShell in WSL requires a few extra steps, but nothing too crazy. You just need to install the LIBSSL dependencies and then install the latest version of PowerShell.
# https://packages.ubuntu.com/focal/libssl1.1
wget -q http://security.ubuntu.com/ubuntu/pool/main/o/openssl/libssl1.1_1.1.1f-1ubuntu2.13_amd64.deb
sudo apt install ./libssl1.1_1.1.1f-1ubuntu2.13_amd64.deb
wget -q https://github.com/PowerShell/PowerShell/releases/download/v7.2.3/powershell_7.2.3-1.deb_amd64.deb
sudo dpkg -i powershell_7.2.3-1.deb_amd64.deb
# pwsh
# chsh -s /usr/bin/pwsh
Once PowerShell is installed we map a few paths in WSL to the Windows paths to make life easier.
- The first is mapping our Linux Git directory to the Windows Git local working directory. This makes all our local repos stay in the same physical path on the disk.
- Next we map the PowerShell profile in Windows into the Linux PowerShell profile path so we don’t need to maintain this independently.
- The last two commands we use to download a font configuration file that maps all the Windows fonts into Linux and we install the Fontconfig library so we can manage those new fonts.
# Install PowerShell
# https://gist.githubusercontent.com/Snozzberries/26b40d579daeb48b37fbef057644a978/raw/03bd775a7b0f7673a83b720ad56669d4198fc3db/Install-PowerShell.sh
# Link local working directory
ln -s /mnt/c/Users/mike/OneDrive/Documents/Git/ /home/mike/git
# Link PowerShell profile
ln -s /mnt/c/Users/mike/OneDrive/Documents/PowerShell/Profile.ps1 /home/mike/.config/powershell/profile.ps1
# Download config file to map fonts from Windows
sudo wget -q https://raw.githubusercontent.com/Snozzberries/Profiles/main/local.conf -P /etc/fonts/
sudo apt install fontconfig
Who would do this?
There are a few influences that drove this forward.
- Scott Hanselman’s Ultimate PowerShell Prompt was really the starting point.
- The Oh My Posh Atomic theme provide a lot of ideas, not to mention the prompt realies heavily on Oh My Posh.
- The PSReadLine team adding really cool features.
But the downsides?
The biggest downside without a doubt is the load times. Having a profile take around 6 seconds to load is not enjoyable. It certainly isn’t the end of the world and there are plenty of efficiencies, such as downloading the ohmyposh.json only on change, to be made, but that is the biggest pain. The other consideration is Oh My Posh can have a noticeably slow response time, especially on systems with multiple endpoint security solutions. We are talking about 10ths of a second here, but for some that could be a deal breaker.